Raingutter Bookshelves!
First, I would measure the space that you want to hang your shelves to be sure you cut it to the right size.
You'll need to head to your local hardware store .. (I went to Home Depot.) and get raingutters.. I used two! But, depending on the size of your area you may want more or less. ALSO, if you are going to do a shelf that connects to another wall like a corner peice.. you'll need to get that connector piece at the hardware store! (I didn't, I actually just used the ends and staggered my shelves on two different walls.. See pic above for mine!!)
*MAKE SURE you get the right and left ends to the rain gutters or you'll end up with no ends or two rights or lefts.. no bueno!*

You'll need a small electric handsaw if you need to cut it to size.. you may want the full length.. up to you! OR just a regular old hand saw will work!
6-8 medium size screws PER raingutter (So, total 12-16 screws.) Depending on the size of the gutter!
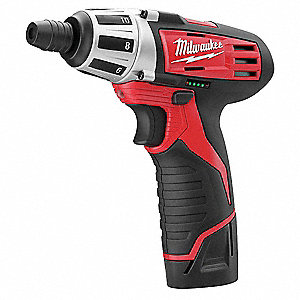
An electric screwdriver.. (If you only have a regualar hand screwdriver that MAY work, but it would be hard!)

A stud finder.. (unless you're just naturally good at finding them! ;) LOL However, it's not a neccessity.. it will just help insure that the shelves will be sturdy!)

And, lots of fun books to put on them of course!!
NOW...
After you get your supplies ready to go... upon measuring your space.. you may or may not want to cut the rain gutters to a particular size with the hand saw..
Once you've got them to the size you desire, it's time to hang them up!
You'll need to borrow some muscles or someone to help hold the rain gutter up and make sure it's straight, while the other person goes on a stud finding mission.. When you find the stud, place the screw (closer to the top/middle of the raingutter) and screw it in all the way in. You'll just repeat that step until you get the rain gutter secured completely with the screws all the way accross the gutter.
Should look something like this.. once you get them screwed in (I like to include pics because I am more of a visual learner...SO they always help me out!)
The placement of the shelves is totally up to you! You can either put them on one wall, or do a corner piece, or stagger them on two walls.. (which is what I did!) Just play with it and find what you like and what works best for your space.. and you can do as many shelves as your heart desires!
Then, you'll just add the ends to the shelves and throw some books on the shelves and you're done!!
PS.
Some of the gutters have little marks on them just from being handled at the hardware store.. you can just use a little scotchbrite pad or soap and water and they rub right off!
My final product is above.. the first picture I posted!!
Happy DIY-ing!!
(If you have ANY questions.. feel free to comment below!!)
XO,
Amber

No comments:
Post a Comment